🎅 10% OFF FOREVER - All Products and Services! Use Code: XMAS10LIFE 🎁 Limited Christmas Holiday Deal!
Automation Partners Ai LLC Help Center & AI Academy
Learn, build, and scale your business with Automation Partners Ai AKA APAi apps, step-by-step with no tech skills required.

Lead Gen-Z 2.0 Onboarding | From Signup to Success -TESTED
Introduction
Welcome to Lead Gen-Z 2.0, it's LIVE NOW and your go-to app for simplifying lead generation. Whether you’re a tech wizard or a complete novice, this step-by-step guide will help you navigate our app smoothly. We believe that onboarding should be intuitive and easy, so even a fifth grader can understand it.
Getting Started: Login/Registration
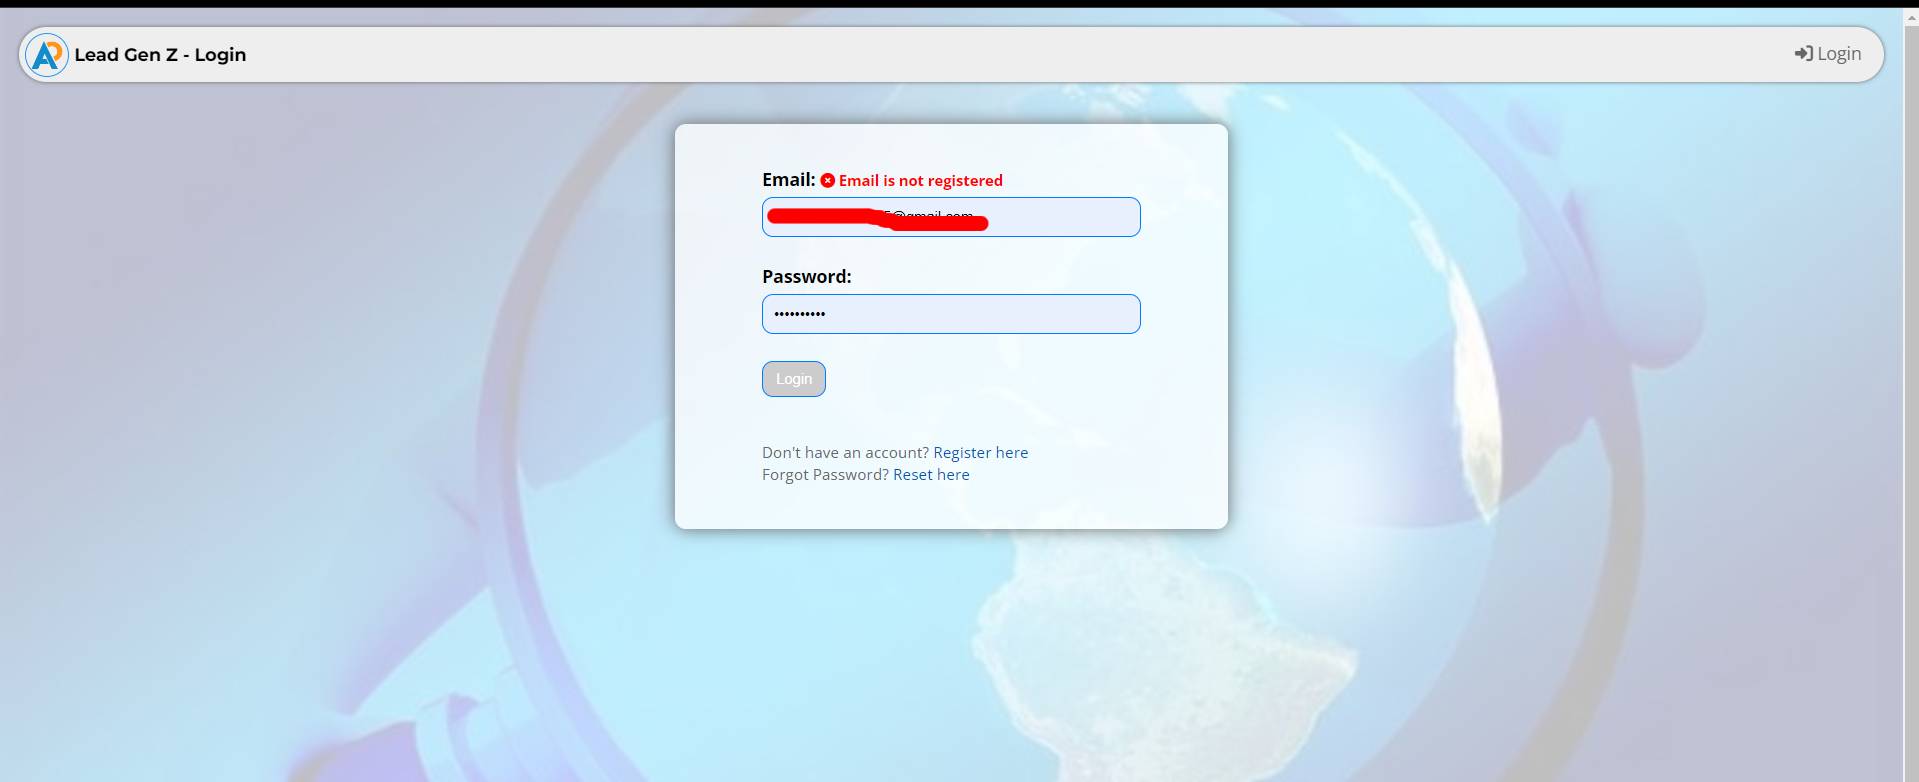
Login Screen
The journey begins with our login screen.
Enter your email and password if you’re already registered.
Registration
If you’re new to the app, click on "Register here".
You will be taken to a registration page where you will fill out:
Full Name
Email
Password
Optional fields: Phone number and address
Successful Registration
After completing the registration, you'll receive a confirmation message.
Login Again
Return to the login page and enter the same credentials you used for registration.
If you have forgotten your password, click “Reset here”, and a reset email will be sent to your inbox.
After Logging In
Once logged in, you'll land on the main screen where you can begin using Lead Gen-Z 2.0
Before accessing all features, you need to subscribe to a plan.
Subscription and Payment
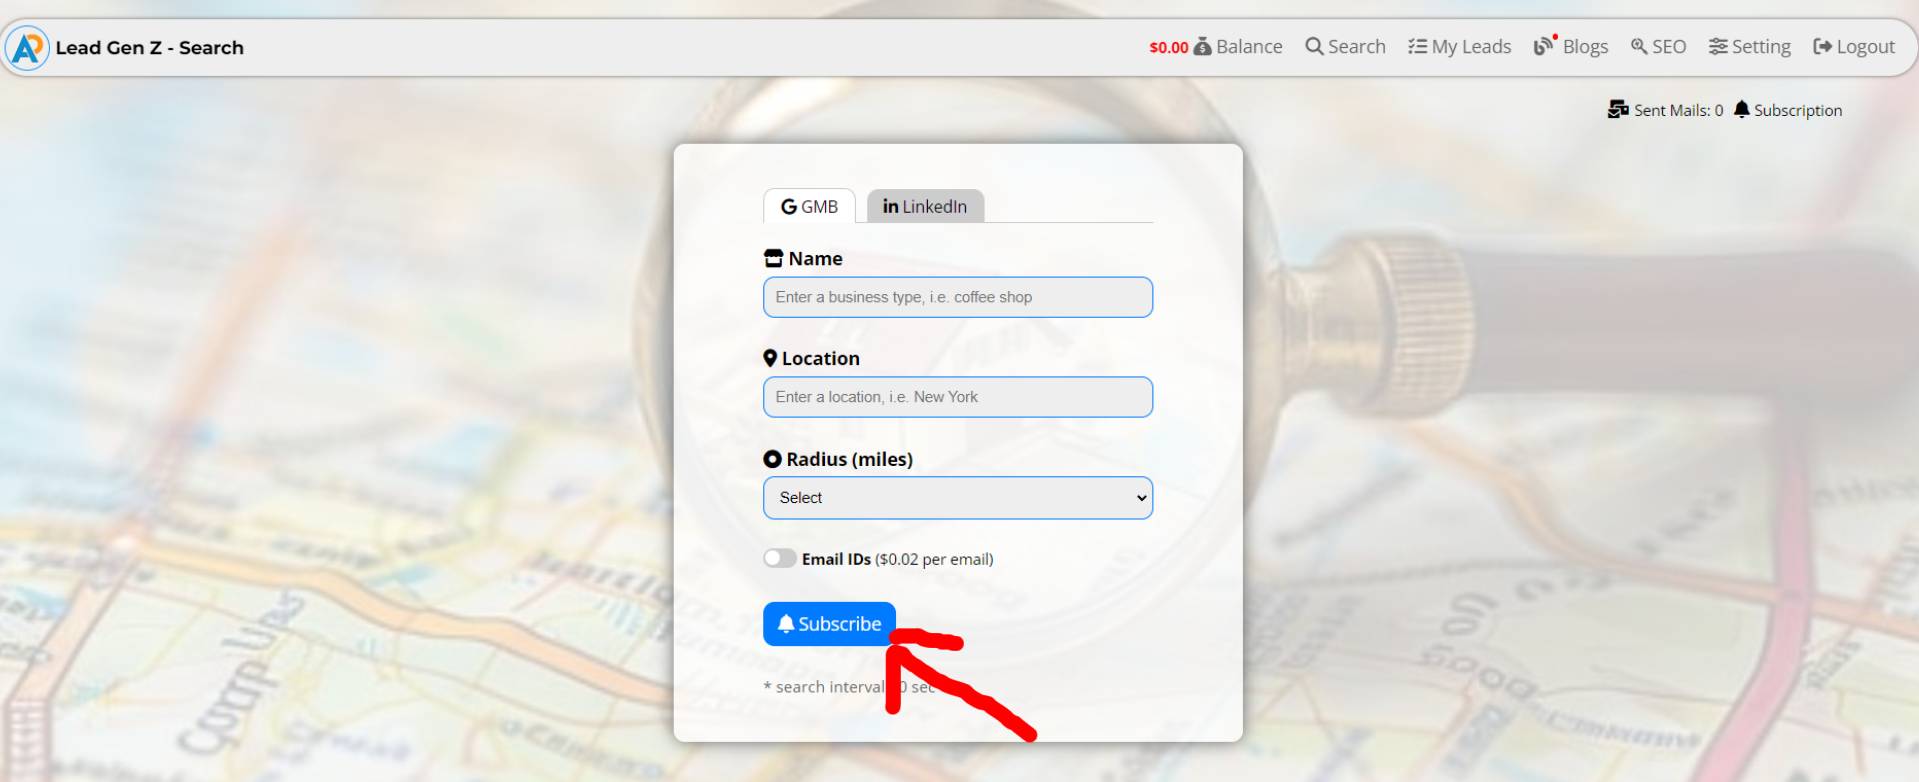
Subscribe Button
Click the Subscribe button to choose a plan.
Select one or more months and pay with PayPal.
If it’s your first time subscribing, your balance will show zero.
A 30-day refund policy is available.
Top Up Wallet
You must fund your wallet with a minimum of $10.
PayPal is available, and Stripe is coming soon.
Setting Up Your Profile
Profile and Settings
After funding your wallet, go to Settings to complete the app configuration.
Google Key Setup in Lead Gen-Z 2.0
Enter your API keys to connect:
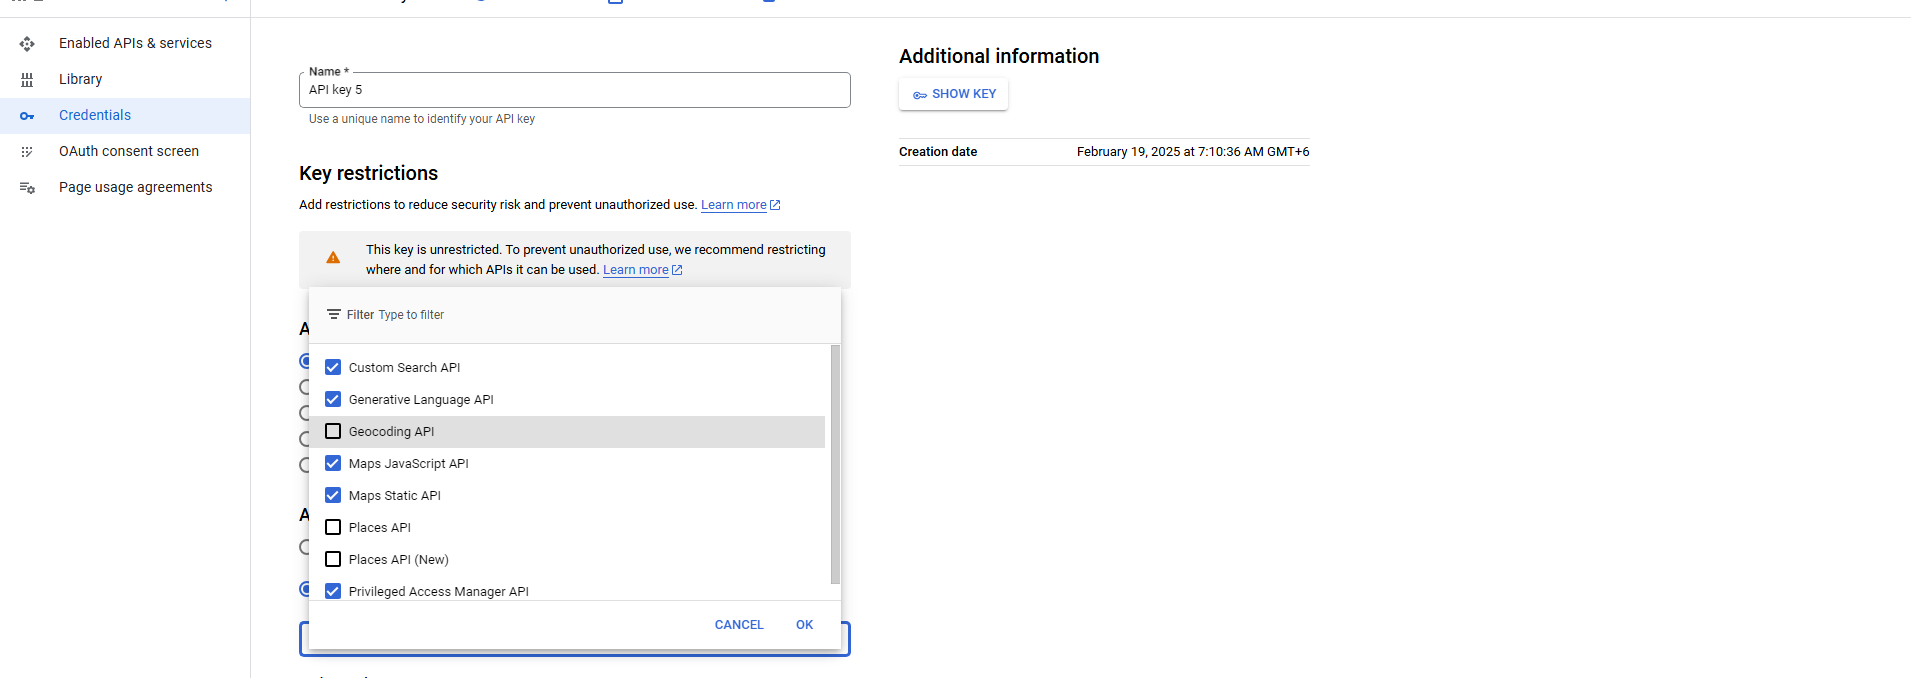
Geocoding API
Google Places
Google Places (NEW)
These keys are accessible from your Google Cloud Console's Library. But you have to make sure you are done with billing setup that you can easily access when you visit google cloud console with your Gmail account and you will see that on your dashboard also left side menu.
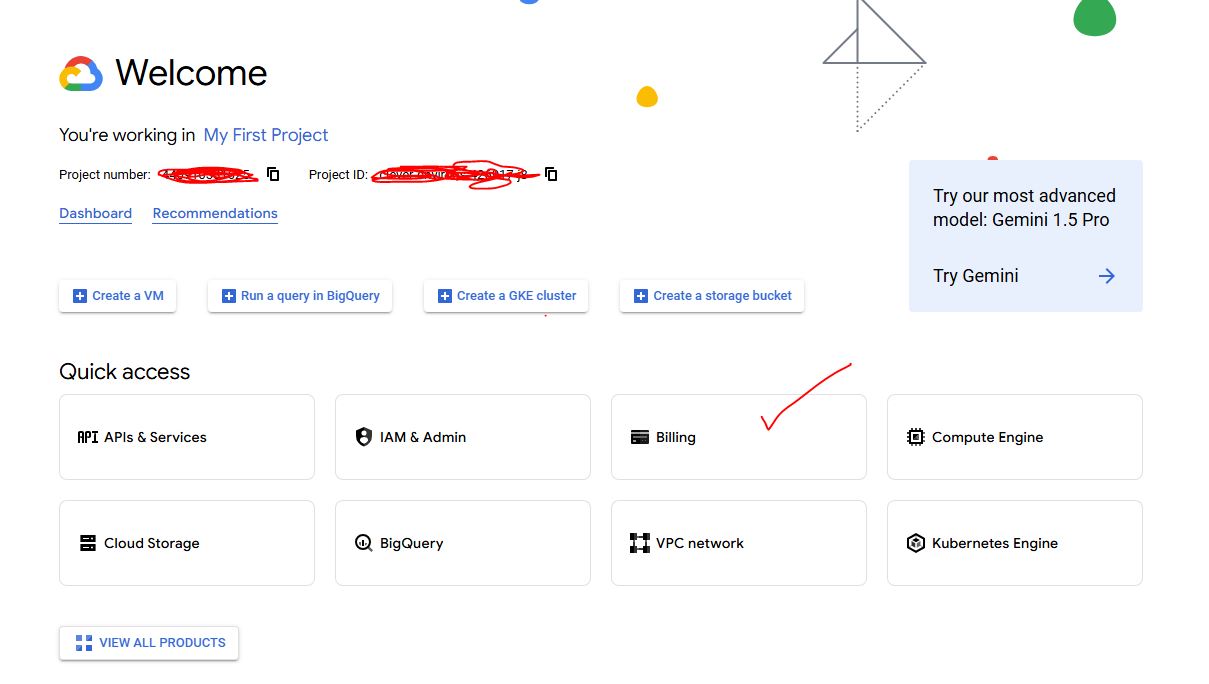
After setting up the billing and installing APIs from Library, go to APIs & Services from side main menu and then Credentials at sub menu.
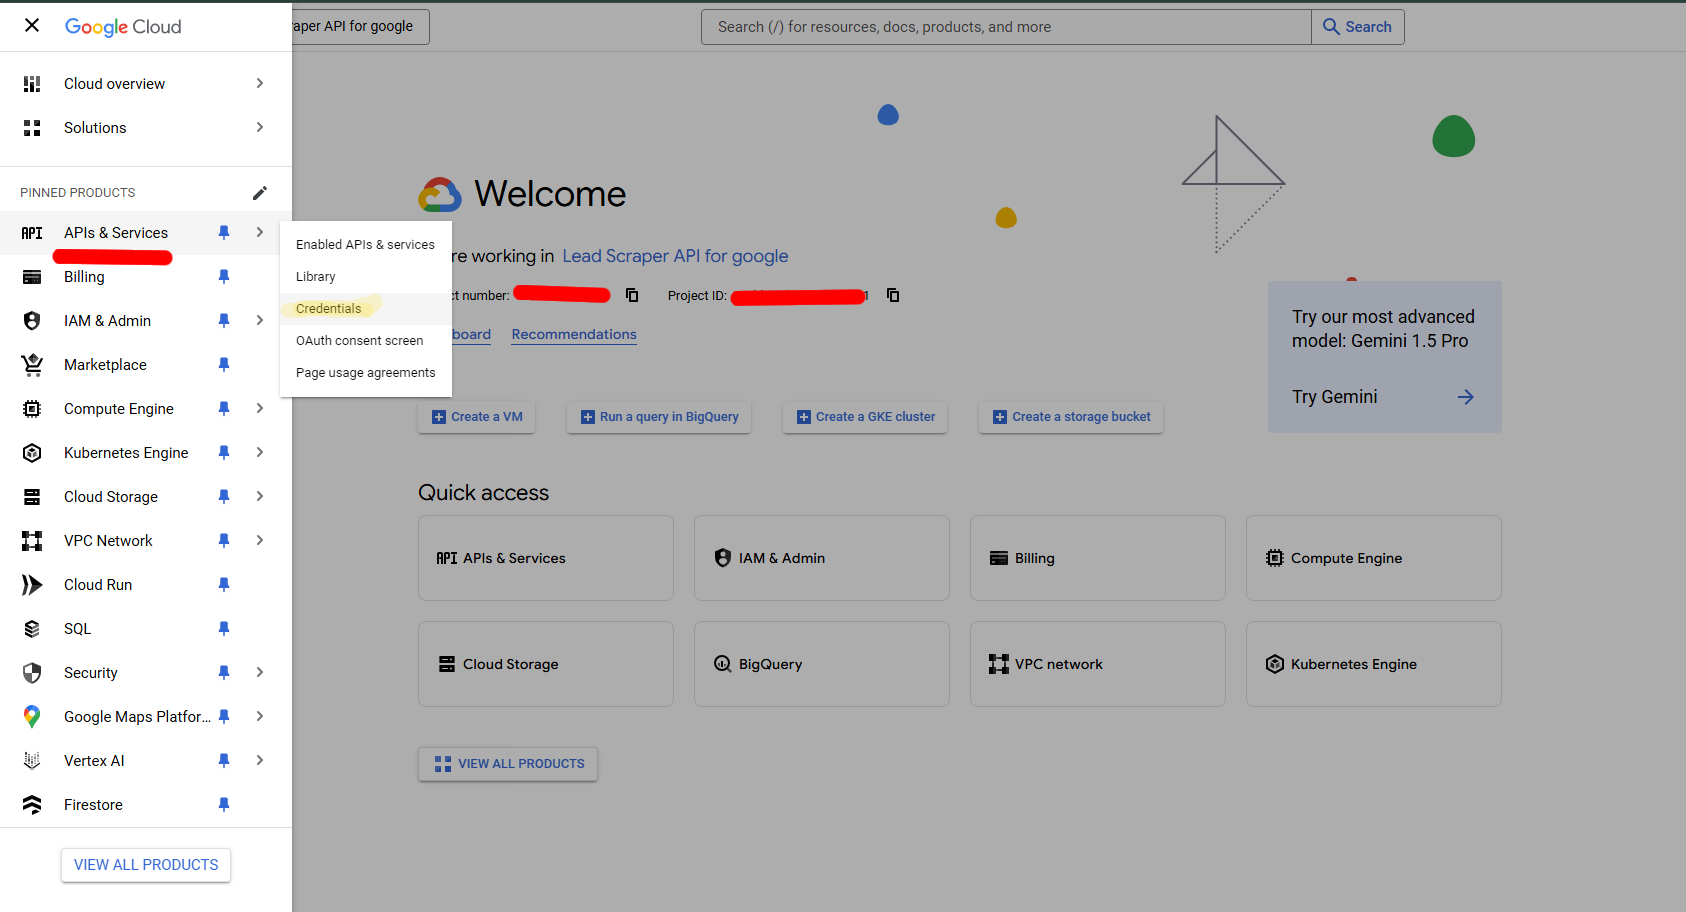
Click on the create credentials and it will immediately create a API key that you can place into lead gen-z 2.0 setting page respective input fields call google API Key.
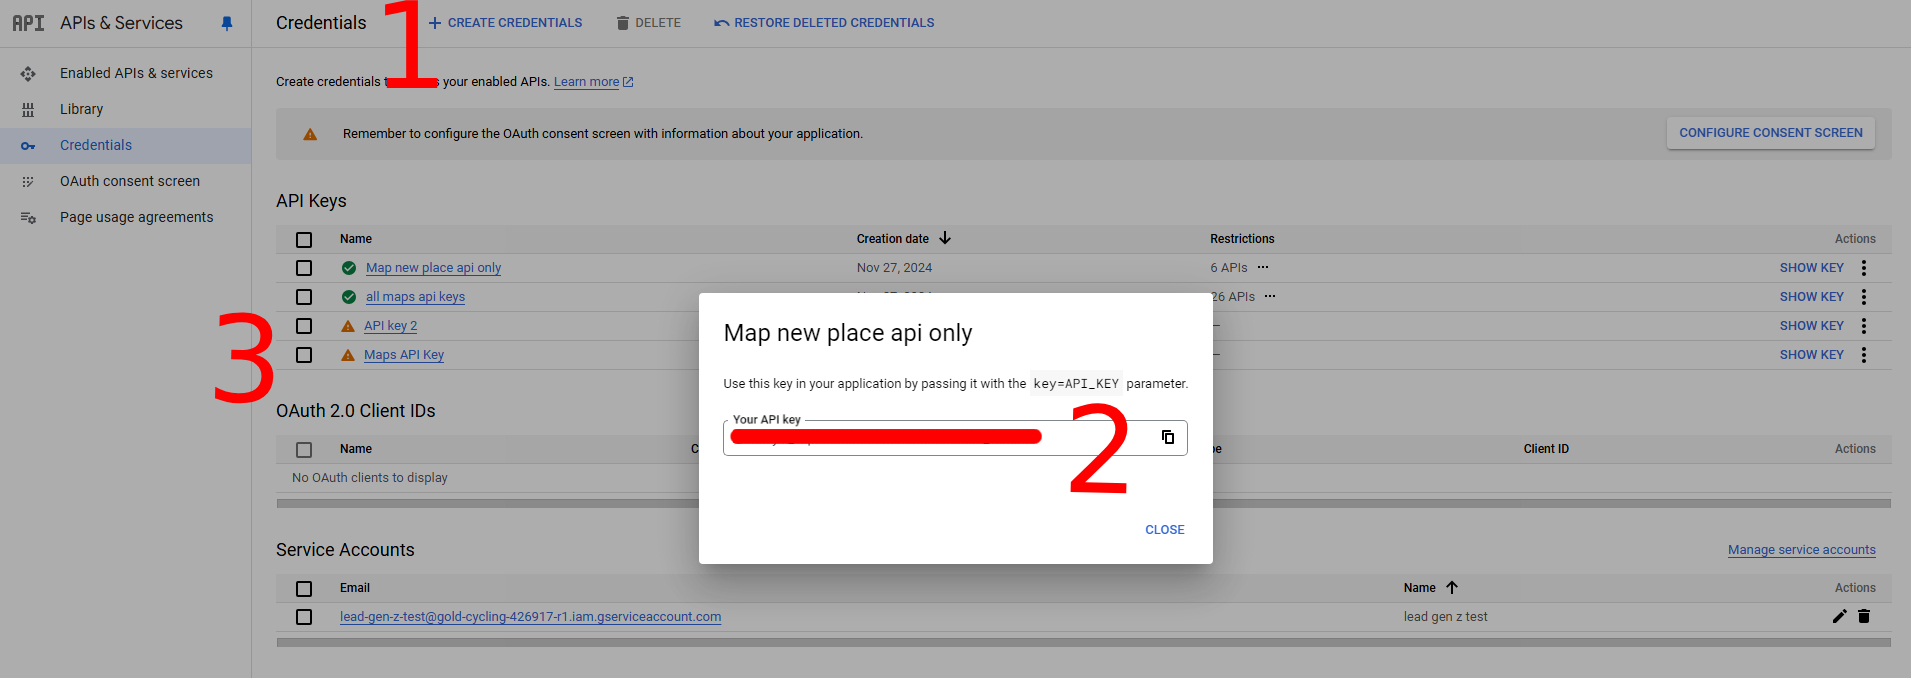
1.Create the credential:
Click on the create credentials and it will immediately create a API
2.Place API in Lead Gen-Z 2.0:
Copy the API and place into lead gen-Z 2.0 setting page respective input fields call google API Key.
3.Restricted API Key:
You'll see warning icon with yellow beside the API key that indicating you to restricted unwanted API key if you already install many unnecessary API key in your google cloud console project.
Gemini Key Setup in Lead Gen-Z 2.0
Any Gemini version API will work. You can easily get your free API key from that carry 10M tokens approximately per month. Such as Gemini Flash 1.5
Settings Configuration
Fill in all the required fields such as:
Profile Information
SMTP Settings
Authorized Representative
Business Information
Mandatory fields are marked with a red asterisk.
Skipping other fields in Lead Gen-Z 2.0 Setting Page
You can skip optional fields (those without a red asterisk) if you’re not ready to fill them in.
You can edit your profile later at any time.
Compliance Information
If you have compliance-related details for content creation, add them in the compliance field provided.
After You Configure Your Account
You are now set up!
You can return to the Search, Blogs, and SEO tabs.
At this point, the app will begin:
Generating leads and sending mail automatically by following google and outlook policies. Each mail keep your mail safe from spam and blacklisted if user setup mail domain's DNS properly.
Writing blogs that bypass search engine Ai detection with highly SEO optimized and more!
Creating SEO also suggest better content than your existing content on your site to create a better visibility on search engine. Also, it bypass search engines Ai detection.
Conclusion
We've crafted this onboarding process to be as simple as possible so you can start generating leads quickly. Follow these steps, and you'll be on your way to success with Lead Gen-Z 2.0.
Contact Us
Automation Partners Ai
11 Chatham Drive, Middlebury CT 06762

